
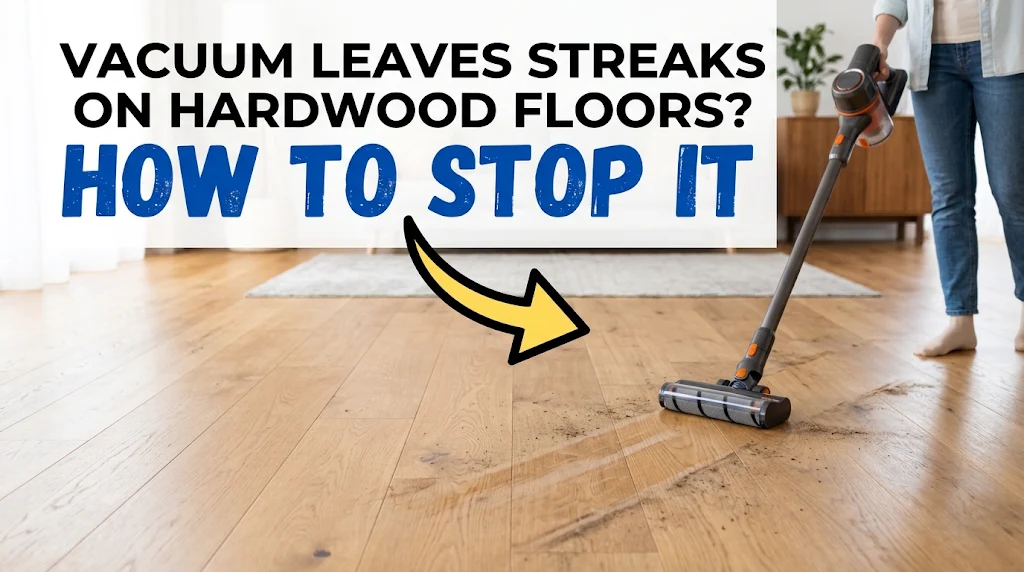
Few sights are as frustrating for a homeowner as finishing a thorough sweep of the house, turning back to admire the work, and seeing unsightly streaks, dull lines, or scuffs running across pristine hardwood floors. Hardwood flooring represents a significant investment, adding warmth, elegance, and value to your home. When your trusty vacuum cleaner leaves behind tracks instead of flawless surfaces, it feels counterproductive and concerning.
The good news is that vacuum streaks on hardwood floors are rarely a sign of permanent damage if addressed promptly. Usually, the issue stems from a handful of mechanical missteps, worn-out components, improper settings, or built-up debris trapped within the vacuum head itself.
In this comprehensive guide, we will break down why your vacuum leaves streaks on hardwood, how to diagnose the exact cause, step-by-step fixes to resolve the problem immediately, and long-term maintenance strategies to keep your floors pristine.
Understanding the Problem: Why Do Vacuum Streaks Occur?
Before diving into solutions, it is essential to understand the mechanics of how vacuum cleaners interact with hardwood finishes. Hardwood floors—whether sealed with polyurethane, wax, oil, or aluminum oxide—rely on a smooth, reflective surface to look their best. Any mechanical friction, oil residue, or dragged debris interrupts how light reflects off the wood, creating visual streaks.
       [ Vacuum Cleaning Action ]
                 │
                 ├── Heavy Friction (Stiff Beater Bars / Rigid Plastic)
                 ├── Trapped Grit & Debris (Pushed along by felt pads/wheels)
                 ├── Oil & Waxy Transfer (Grime buildup on wheels/brushes)
                 └── Static Charge Accumulation (Attracting fine dust back to surface)
                 │
                 ▼
     [ Visually Dull or Scuffed Streaks ]
The 4 Main Types of Vacuum Streaks
Identifying the type of streak on your floor is the fastest route to diagnosing the culprit:
Dull Gray or Black Rubber Marks: Caused by worn or degrading rubber wheels sliding rather than rolling across the wood.
Dusty or Smears-Like Tracks: Occur when fine dust, oil, or wax buildup on the vacuum’s undercarriage gets dragged across the surface.
Fine Surface Scratches: Result from hard plastic edges, stuck grit, or an active rotating brush bar grinding small particles directly into the floor finish.
Static Dust Lines: Caused by static electricity drawing fine dust back to the floor in parallel lines right along the vacuum’s exhaust or wheel paths.
Section 1: The Top 5 Causes of Vacuum Streaks on Hardwood Floors
1. An Active Beater Bar or Rotating Brush Roll
The primary culprit behind hardwood floor streaks and scratches is an active beater bar (brush roll).
Designed primarily for lifting stubborn dirt out of carpet fibers, beater bars feature stiff nylon or synthetic bristles that rotate at high revolutions per minute (RPM). When applied to bare wood, these stiff bristles act like mild sandpaper. Instead of sweeping, they slap the protective finish, causing micro-abrasions that appear as hazy, cloudy streaks over time.
Key Takeaway: Never use a rotating brush roll on bare hardwood floors unless the machine specifically features soft, fine velvet or micro-fluff roller technology designed for hard surfaces.
2. Trapped Debris and Debris Buildup in Wheels
Vacuum wheels are designed to roll smoothly across surfaces, but they easily collect hair, threads, sticky residues, and tiny pebbles (like cat litter or outdoor grit).
When hair wraps tightly around the wheel axel, the wheel stops spinning freely. Instead of rolling, the frozen wheel drags across your hardwood floor. If tiny pieces of grit get embedded into the soft rubber or plastic of the frozen wheel, it acts like a continuous scoring tool, leaving clean or scratched lines in its wake.
3. Worn, Hard, or Damaged Undercarriage Parts
Over years of use, the protective felt pads, rubber bumpers, and soft strips beneath your vacuum head wear down.
When these protective elements erode, the raw, hard plastic casing of the vacuum head drops closer to the floor. As you push and pull the vacuum, this hard plastic scrapes against high spots or uneven floorboards, transferring plastic friction marks or scraping off the top layer of floor finish.
4. Dirty Wheels, Felt Strips, and Soft Rollers
Even if your vacuum components are working properly mechanically, cleanliness matters.
If you recently vacuumed a kitchen floor covered in grease spills, or a hallway coated in dried mud, that grime transfers directly to the soft felt strips and wheels under the vacuum head. The next time you vacuum your hardwood, those dirty components act like a paint roller, transferring dirt and oily residue back onto the floor in long, uniform streaks.
5. Incorrect Suction or Height Settings
Vacuuming hardwood floors requires a different airflow balance than carpeting.
Excessive Suction: If your vacuum’s suction is set too high, it creates a powerful seal against the flat floorboards, pulling the vacuum head down so tightly that the undercarriage drags forcefully against the finish.
Low Height Settings: Setting the vacuum head too low reduces air clearance, preventing large dirt particles from entering the suction path. Instead of being vacuumed up, those trapped particles get pushed across the floor under the front edge of the head.
Section 2: Step-by-Step Troubleshooting Framework
To isolate the cause of your vacuum streaks quickly, use this simple 4-step diagnostic process.
+-------------------------------------------------------------------+
|                   4-STEP DIAGNOSIS CHECKLIST                      |
+-------------------------------------------------------------------+
|  [ ] STEP 1: Inspect the Brush Roll                              |
|      - Is it spinning? Can it be switched OFF?                    |
|                                                                   |
|  [ ] STEP 2: Check Wheel Mobility & Cleanliness                   |
|      - Do all wheels spin freely 360 degrees?                     |
|      - Is hair or debris wrapped around the axles?                |
|                                                                   |
|  [ ] STEP 3: Examine Undercarriage Padding & Felt                 |
|      - Are felt strips present, clean, and intact?                |
|      - Is hard plastic making direct contact with the floor?      |
|                                                                   |
|  [ ] STEP 4: Test Suction and Height Adjustment                   |
|      - Is suction sealing the head down to the floorboards?       |
+-------------------------------------------------------------------+
Pro Tip: The “Sheet of Paper” Test
To check whether your vacuum wheels or undercarriage are applying uneven pressure or scraping your floor:
Place a clean sheet of white printer paper on your hardwood floor.
Position your vacuum head directly on top of the paper.
Gently pull the paper out from under the vacuum head with the unit turned off.
Result: If the paper catches, rips, or requires heavy force to pull, your vacuum head is sitting too low, or hard plastic components are dragging on the ground.
Section 3: How to Fix Vacuum Streaks on Hardwood (Immediate Solutions)
Now that you know what causes these frustrating streaks, here are actionable fixes to stop them immediately.
        PROBLEM                              IMMEDIATE FIX
┌───────────────────────┐             ┌────────────────────────────────┐
│ Active Brush Roll     │ ──────────► │ Disengage Brush / Switch to    │
│                       │             │ Bare Floor Mode                │
└───────────────────────┘             └────────────────────────────────┘
┌───────────────────────┐             ┌────────────────────────────────┐
│ Frozen/Dirty Wheels   │ ──────────► │ Clean Axles with Seam Ripper;  │
│                       │             │ Wipe Wheels with Alcohol       │
└───────────────────────┘             └────────────────────────────────┘
┌───────────────────────┐             ┌────────────────────────────────┐
│ Worn Hard Underside   │ ──────────► │ Apply Self-Adhesive Felt Tape  │
│                       │             │ to Contact Points              │
└───────────────────────┘             └────────────────────────────────┘
┌───────────────────────┐             ┌────────────────────────────────┐
│ Suction Drag          │ ──────────► │ Lower Suction / Open Bleeder   │
│                       │             │ Valve for Hard Floors          │
└───────────────────────┘             └────────────────────────────────┘
Fix #1: Turn Off the Beater Bar / Switch to Hard Floor Mode
If your vacuum has a brush roll switch, ensure it is set to OFF or turned to the Bare Floor / Hardwood setting before cleaning non-carpeted areas.
Upright Vacuums: Look for a foot pedal or handle switch labeled “Brush Roll On/Off.”
Canister & Stick Vacuums: Switch to a specialized soft parquet floor tool or fluffy roller head attachment.
If your brush roll cannot be turned off: Do not use that specific floor head on hardwood. Switch to a hard floor nozzle attachment that relies solely on suction and soft bristles.
Fix #2: Thoroughly Clean and Unblock the Wheels
Restoring free movement to your vacuum wheels is one of the easiest ways to eliminate drag streaks.
Turn off and unplug your vacuum cleaner.
Flip the vacuum over to expose the bottom plate and wheels.
Use a pair of small scissors or a seam ripper to carefully slice trapped hair, strings, and fibers wrapped around the wheel axles.
Pull out all freed debris using needle-nose pliers.
Dampen a microfiber cloth with rubbing alcohol and thoroughly wipe down the tread of every wheel to remove built-up oil, floor wax, and sticky dirt.
Test each wheel with your finger to verify that it spins smoothly without resistance.
Fix #3: Add Felt Tape to Undercarriage Contact Points
If your vacuum head lacks soft padding or the original felt strips have worn away, you can modify it using inexpensive peel-and-stick felt tape.
Purchase heavy-duty, self-adhesive felt strips (commonly used for furniture legs).
Cut small, narrow strips to match the high-friction plastic edges beneath your vacuum head.
Stick the felt strips along the front and side plastic borders, ensuring they do not block the suction channel or interfere with the wheels.
This simple modification creates a soft buffer between hard plastic and your wood floor.
Example: A homeowner noticed dark plastic scuff marks after vacuuming with an entry-level stick vacuum. After cleaning the wheels and applying 1/8-inch thick felt tape along the front bumper edge, the scuff marks vanished completely during subsequent cleanings.
Fix #4: Adjust Suction Power and Clearance Height
If your vacuum head feels heavy or difficult to push across bare wood, adjust the settings to balance airflow:
Reduce Suction: Open the suction bleeder valve on the handle (if available) or lower the suction setting on the canister motor. This stops the head from forming a tight seal against the floorboards.
Raise Floor Clearance: If using a vacuum with manual height adjustment, raise the nozzle up one notch from the lowest setting. This provides enough clearance for debris to enter while preventing hard plastic edges from dragging.
Section 4: How to Safely Remove Existing Vacuum Streaks from Hardwood
If your vacuum has already left unsightly streaks or marks across your hardwood floor, do not panic. Most surface streaks can be removed without refinishing the floor, provided you use the correct technique based on the mark type.
      STREAK TYPE                             SAFE REMOVAL METHOD
┌───────────────────────┐             ┌─────────────────────────────────────┐
│ Rubber/Plastic Scuffs │ ──────────► │ Tennis Ball Friction / Microfiber   │
│                       │             │ + pH-Neutral Cleaner                │
└───────────────────────┘             └─────────────────────────────────────┐
│ Sticky/Waxy Dirt Lines│ ──────────► │ Microfiber + Diluted Isopropyl      │
│                       │             │ Alcohol (Spot Clean Only)           │
└───────────────────────┘             └─────────────────────────────────────┘
│ Fine Surface Haze     │ ──────────► │ Dedicated Hardwood Polish/Restorer  │
│                       │             │ (Polyurethane Finish Compatible)    │
└───────────────────────┘             └─────────────────────────────────────┘
Method 1: Removing Black Rubber or Plastic Scuff Marks
Rubber marks left by stuck vacuum wheels are surface deposits, meaning they sit on top of the finish rather than penetrating the wood.
The Tennis Ball Trick: Cut a small “X” into a clean tennis ball, place it onto the end of a broom handle, and rub the tennis ball firmly over the scuff mark. The felt texture safely lifts rubber scuffs off polyurethane finishes without scratching.
Microfiber & pH-Neutral Cleaner: Spray a small amount of pH-neutral hardwood floor cleaner onto a clean microfiber cloth (never spray liquid directly onto the wood floor). Rub the scuff mark firmly along the direction of the wood grain until it lifts.
Method 2: Clearing Away Waxy, Oily Dirt Tracks
Oily or dirt-based vacuum streaks occur when grime breaks down and smears across the floor finish.
Mix 1 part isopropyl rubbing alcohol with 4 parts distilled water in a small spray bottle.
Lightly mist a microfiber towel with the solution.
Gently buff the streaked areas in straight lines following the wood grain.
Dry the area immediately using a separate dry microfiber towel to prevent moisture from lingering on the wood joints.
Method 3: Addressing Micro-Scratches and Dullness
If a rotating brush roll has created a dull, foggy haze of tiny micro-scratches across your floor, standard cleaning alone will not restore the shine.
Clean the floor thoroughly to remove all surface dust and residue.
Apply a specialized hardwood floor restorer or polish designed specifically for your floor’s finish type (e.g., polyurethane-safe restorer).
Work in small sections, spreading the restorer evenly with a clean microfiber applicator pad following the wood grain.
Allow the floor to dry completely according to the manufacturer’s instructions before walking on it or vacuuming again.
Warning: Avoid using vinegar, ammonia, steam mops, or harsh abrasive pads on hardwood floors. Vinegar breaks down protective polyurethane coatings over time, while steam forces moisture into wood joints, leading to warping, cupping, and finish peeling.
Section 5: Common Pitfalls and Mistakes to Avoid
Even well-intentioned floor care routines can inadvertently damage hardwood floors. Here are frequent errors homeowners make when vacuuming hardwood:
+-------------------------------------------------------------------+
|                     FLOOR CARE PITFALLS TO AVOID                  |
+-------------------------------------------------------------------+
|  [!] Using Steam Mops or Wet Vacuuming on Sealed Hardwood         |
|      - Risk: Forces water into seams, causing wood expansion.     |
|                                                                   |
|  [!] Using All-Purpose Cleaners or Dish Soap                      |
|      - Risk: Leaves sticky residues that attract future streaks.  |
|                                                                   |
|  [!] Vacuuming Wet Debris or Sticky Spills                        |
|      - Risk: Transfers sticky grime straight to vacuum wheels.    |
|                                                                   |
|  [!] Forcing a Resistance-Heavy Vacuum Across Wood                |
|      - Risk: Indicates frozen wheels or plastic dragging.         |
+-------------------------------------------------------------------+
Assuming “Hard Floor Mode” Means Universal Safety: Some vacuums advertise a hard floor mode that merely turns off the brush roll, but still rely on hard, narrow wheels that lack soft rubber casing. Always verify that your vacuum head rides on soft rubber or soft felt.
Neglecting Vacuum Maintenance: Allowing hair and pet fur to build up around wheel axles guarantees wheel seizure eventually. Inspect and clean your vacuum’s undercarriage at least once a month.
Using Excessive Liquid Cleaners: When trying to buff out vacuum streaks, spraying excessive liquid cleaner directly onto the floor allows moisture to seep into wood seams, leading to board edge discoloration and swelling. Always damp-apply cleaners onto microfiber cloths first.
Section 6: Selecting the Best Vacuum for Hardwood Floors
If your current vacuum unit lacks proper hard floor protections, modifying it may only provide a temporary solution. Investing in a hardwood-friendly vacuum setup protects your flooring investment over the long term.
Key Features to Look For in a Hardwood Vacuum
| Feature | Why It Matters | What to Look For |
| Dedicated Parquet/Hardwood Tool | Eliminates beater bar contact entirely | Natural horsehair or soft synthetic bristles with wide suction channels |
| Soft Fluffy Roller Head | Captures fine dust and large debris simultaneously | Soft velvet fabric rolls designed for hard surfaces |
| Rubberized Soft Wheels | Prevents plastic-on-wood scraping | Large, soft-tread wheels that roll smoothly over board joints |
| Variable Suction Control | Prevents vacuum head from sealing tightly against floors | Electronic suction control or manual air release valves |
| Lightweight Design | Reduces downward force and friction on delicate finishes | Canister models or lightweight stick vacuums under 7 lbs |
Recommended Vacuum Types for Hardwood
Canister Vacuums: Generally considered the gold standard for hardwood flooring. The heavy motor unit stays stationary or rolls on wide rubber wheels while you maneuver a lightweight wand equipped with a soft horsehair brush head.
Cordless Stick Vacuums with Soft Roller Heads: Modern cordless stick vacuums equipped with specialized soft-woven velvet rollers gently polish floors while capturing fine dust without scratching.
Frequently Asked Questions (FAQ)
Why does my vacuum leave streaks on hardwood floors but not on tile?
Tile surfaces are generally harder, less reflective, and feature textured grout lines, which prevent minor wheel friction or light residue from showing. Hardwood floors feature a smooth, continuous protective finish (like polyurethane) that reflects light evenly, making any oil transfer, wheel drag mark, or micro-scratch immediately visible.
Can a vacuum cleaner permanently scratch hardwood floors?
Yes. If the rotating beater bar is kept active, or if sharp grit (such as small stones, glass, or metal fragments) gets jammed underneath a locked wheel or plastic undercarriage, dragging the vacuum can carve scratches through the topcoat and into the wood grain.
How often should I clean my vacuum wheels to prevent floor streaks?
It is best practice to inspect and wipe down your vacuum wheels once every month. However, if you have long hair in the household or pet fur, inspect the wheel axles after every 2–3 cleaning sessions to remove wrapped fibers before they lock the wheels.
Is it better to sweep or vacuum hardwood floors?
Vacuuming with a hardwood-safe attachment (no brush roll, soft bristles) is actually superior to sweeping. Sweeping with a traditional broom pushes fine dust into the gaps between floorboards and creates airborne dust. A hard-floor-safe vacuum pulls dirt out of cracks without scraping the wood.
Conclusion
Vacuum streaks on hardwood floors are a frustrating nuisance, but they are entirely preventable. By understanding how your vacuum interacts with your floor’s finish, maintaining clean and free-spinning wheels, disengaging harsh beater bars, and adjusting suction levels, you can eliminate unsightly tracking marks for good.
