
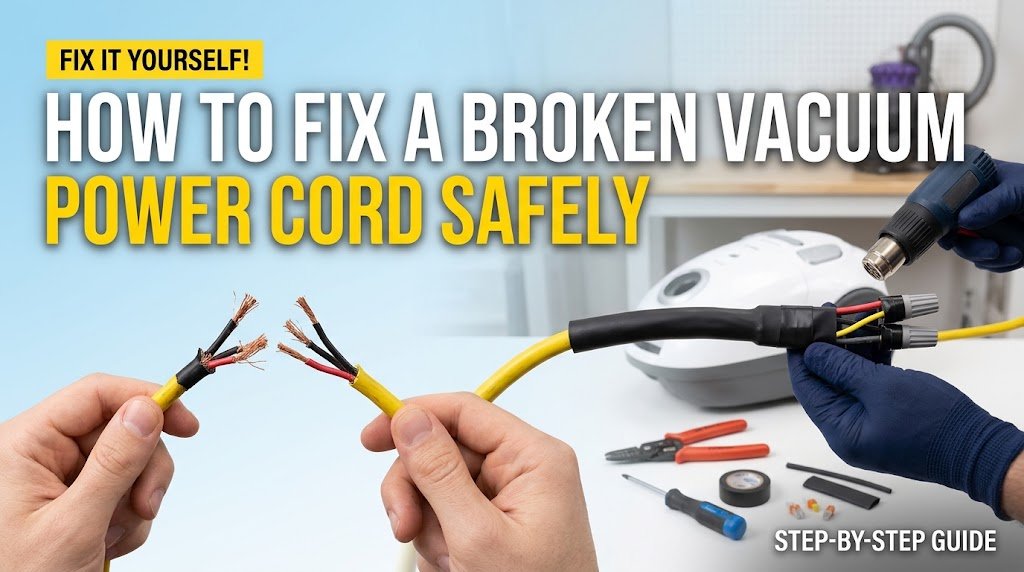
A damaged or fraying power cord is one of the most common issues homeowners face with upright, canister, and shop vacuums. Because vacuum cleaner cords are constantly stretched, pulled around sharp furniture corners, and repeatedly wound up, the copper wiring inside is subjected to high mechanical stress.
Ignoring a damaged cord isn’t just an inconvenience—it poses severe electrical hazards, including electrical shocks, short circuits, damaged vacuum motors, and even potential house fires.
Fortunately, repairing or replacing a broken vacuum cord does not require an electrical engineering degree. With basic tools, safety precautions, and clear instructions, you can safely fix your vacuum cord at home for a fraction of the cost of a replacement machine or professional service call.
Understanding the Risk: Why Power Cord Repair Demands Safety First
Before picking up a screwdriver, it is vital to understand the electrical dynamics of home vacuums. Most residential vacuums operate on 120 volts (or 220–240 volts internationally) and draw high current, often between 7 to 12 Amps.
+-------------------------------------------------------------------------+
|                          ELECTRICAL SAFETY RULES                        |
|                                                                         |
|  [1] Always Unplug First ---> [2] Inspect Full Length ---> [3] No Tape  |
+-------------------------------------------------------------------------+
When a cord suffers internal wire breaks or outer insulation damage, the exposed conductors can short-circuit. Applying a quick strip of standard electrical tape over exposed copper is never a permanent or safe solution for high-draw appliances like vacuums.
Key Takeaway: Electrical tape is designed for secondary insulation and small wire splices—not to restore structural integrity or mechanical strain relief on a high-amperage, constantly moving appliance cord.
Primary Types of Power Cord Damage
Outer Sheath Fraying: The outer rubber insulation cracks or tears, but internal insulated conductors remain intact.
Exposed Bare Wires: The inner insulation tears, exposing live copper conductors.
Internal Wire Break: The outer cord looks intact, but the internal copper strands have severed, causing intermittent power loss when the cord bends.
Plug Damage: The prongs are bent, scorched, or loose near the molded plug base.
Tools and Equipment Needed for the Repair
Having the proper electrical tools ensures a secure, code-compliant, and durable repair.
| Tool / Material | Purpose | Required Specs / Notes |
| Wire Strippers & Cutters | Stripping insulation without cutting inner copper | 12-16 AWG gauge slots |
| Heat Shrink Tubing | Providing mechanical strength and electrical insulation | Dual-wall adhesive-lined (3:1 shrink ratio) |
| Replacement Plug or Cord | Heavy-duty replacement component | 2-prong or 3-prong (grounded) matching original |
| Heat Gun / Lighter | Collapsing shrink tubing uniformly | Controlled heat source |
| Screwdrivers | Opening vacuum chassis access panels | Phillips (#1, #2) and Torx bits |
| Multimeter | Testing electrical continuity before reassembly | Standard digital multimeter |
Option 1: Repairing Minor Damage or Installing a Replacement Plug
If the damage is localized near the plug end (within 6 to 12 inches of the outlet prongs), replacing the plug end is the quickest, most practical repair method.
Step 1: Disconnect and Discharge
Unplug the vacuum completely from the wall outlet. Press the power switch back and forth twice to discharge any residual capacitance within the motor circuits.
Step 2: Cut Away the Damaged Section
Using heavy-duty wire cutters, snip the cord cleanly approximately 1 to 2 inches behind the damaged area (toward the vacuum side). Discard the damaged plug portion.
Step 3: Strip Outer and Inner Insulation
Slide a piece of heat shrink tubing down the cord past your cut site (you will use this later for strain reinforcement).
Strip roughly 1.5 inches of the outer rubber sheath, exposing the inner insulated wires (Hot, Neutral, and Ground if applicable).
Strip 1/2 inch of insulation off each inner wire using the correct gauge slot on your wire strippers.
Pro Tip: Avoid nicking or cutting any individual copper strands while stripping. Broken copper strands reduce current-carrying capacity, creating localized resistance heat.
       Outer Sheath               Inner Wires (Stripped 1/2")
  =====================---------\ [Black / Hot] ---- [Bare Copper]
                       \--------\ [White / Neutral] -- [Bare Copper]
Step 4: Wire the Heavy-Duty Replacement Plug
Open your commercial-grade replacement plug. Thread the wires through the plug housing:
Black Wire (Hot): Connect to the Brass screw terminal.
White Wire (Neutral): Connect to the Silver screw terminal.
Green Wire (Ground – if 3-prong): Connect to the Green grounding screw terminal.
Wrap the copper wire clockwise around each terminal screw so that tightening the screw pulls the wire tighter into the junction. Firmly tighten all screws and clamp the plug’s built-in strain relief bracket onto the outer sheath of the cord.
Option 2: Splicing Mid-Cord Damage (Inline Wire Repair)
When damage occurs midway through the cord length, you have two safe options: shorten the cord by cutting at the damage point and attaching a plug, or perform a solder-and-heat-shrink inline splice.
[Step A: Cut & Stagger Wires] ---> [Step B: Solder & Heat-Shrink] ---> [Step C: Test Continuity]
Step-by-Step Inline Splice Instructions
Stagger the Cuts: Cut the damaged wires so the splices for the Hot and Neutral lines are offset by at least 1.5 inches. Staggering prevents the splices from creating a bulky lump and eliminates the possibility of wire-to-wire shorting.
Slide Outer Heat Shrink First: Remember to slide a large 3:1 adhesive-lined heat shrink tube over the main outer jacket before joining the individual wires.
Join and Solder Conductors: Twist matching wire pairs (Hot-to-Hot, Neutral-to-Neutral) using a lineman’s splice pattern. Apply a soldering iron and flux-core solder until the liquid solder flows completely through the copper strands.
Seal Each Wire Independently: Slide small heat shrink sleeves over each individual solder joint and apply heat until adhesive oozes slightly from the ends.
Seal the Outer Jacket: Slide the larger outer heat shrink tubing over the entire staggered assembly. Shrink it down using a heat gun, starting from the center and moving outward to prevent trapping air pockets.
Example Scenario: If a vacuum cord gets nicked under a door frame, staggering the internal cuts by 2 inches ensures that even under severe flex, two exposed points will never touch each other inside the harness.
Option 3: Complete Power Cord Replacement
If the power cord has multiple cracking points, exposed wires along several sections, or severe internal failure near the chassis entrance, replacing the entire cord assembly is the safest and most reliable choice.
+-------------------------------------------------------------------------------+
|                       VACUUM CHASSIS REPLACEMENT STEPS                        |
|                                                                               |
| [1] Disassemble Panel -> [2] Map Internal Wire Terminals -> [3] Swap Cord     |
+-------------------------------------------------------------------------------+
Step 1: Access the Internal Terminal Block
Remove the main housing screws holding the motor cover or switch compartment together. Set screws aside systematically. Locate where the cord enters the chassis through the rubber strain relief boot.
Step 2: Document Wire Connections
Before disconnecting any wiring, take a clear photo of the internal connections with your smartphone. Pay special attention to:
Wire nut colors and groupings
Push-on spade terminal connections at the power switch
Route paths around internal cord clips
Step 3: Remove the Old Strain Relief
Unclamp or unhook the internal strain relief block. Disconnect the old cord terminals (usually spade connectors or wire nuts connecting to the motor switch).
Step 4: Install the New Power Cord
Feed the new OEM or heavy-duty universal replacement cord through the original rubber boot strain relief.
Crimp matching terminal connectors (spade or ring terminals) onto the new cord leads using a quality wire crimping tool.
Attach the leads according to your reference photo:
Hot (Black): Connects to the power switch inlet.
Neutral (White): Connects directly to the motor leads or circuit board feed.
Ground (Green, if equipped): Securely fastens to the motor housing or metal chassis frame.
Testing Your Repair with a Multimeter
Never plug a newly repaired appliance into an active wall socket without testing continuity first.
       +-------------------------------------------------------------+
       |                  MULTIMETER TESTING GUIDE                   |
       |                                                             |
       |  Hot Pin  -------------> Hot Terminal   (Beep = Good)       |
       |  Neutral Pin ----------> Neutral Term   (Beep = Good)       |
       |  Hot Pin  -------------> Neutral Pin    (No Beep = Safe)    |
       +-------------------------------------------------------------+
Set Multimeter to Continuity Mode (indicated by a sound wave symbol).
Test Hot Line: Touch one probe to the brass prong on the plug and the other to the downstream hot side of the repair/switch. The multimeter should beep (0 ohms resistance).
Test Neutral Line: Touch one probe to the silver prong and the other to the neutral side. The multimeter should beep.
Check for Short Circuits: Touch one probe to the brass prong and the other to the silver prong (with the vacuum switch off). There should be NO beep or continuity. If it beeps, you have a short circuit inside your repair!
Common Mistakes to Avoid During Vacuum Cord Repair
Using Twist-On Wire Nuts Without Secondary Anchoring: Standard wire nuts can vibrate loose due to intense vacuum motor vibrations. If using wire nuts inside the housing, secure them with electrical tape or use lever-nut connectors (WAGO style).
Bypassing the Strain Relief Mechanism: Removing or ignoring the cord anchor near the vacuum base causes tension to pull directly on internal electrical joints. Always re-engage or replace the strain relief clamp.
Under-Gauging the Wire: Replacing a 14 AWG vacuum cord with a thin 18 AWG lamp cord will lead to severe cord overheating, voltage drop, and potential fire risk. Always match or exceed the original wire gauge rating (AWG).
Using Electrical Tape as Outer Shielding: Tape unravels over time when exposed to friction, carpet fibers, and motor warmth, exposing live wires once again.
Frequently Asked Questions (FAQ)
Can I just wrap electrical tape around an exposed vacuum wire?
No. Electrical tape does not provide adequate mechanical strength against stretching, flexing, or dragging across floors. It can easily peel off, leaving live wires exposed. Use adhesive-lined heat shrink tubing or replace the cord section.
What gauge wire is used for vacuum cleaner cords?
Most standard household vacuum cleaners use 16 AWG or 14 AWG two-conductor (or three-conductor) flexible copper cords (type SJT or SJTW). Check the writing stamped on the side of your original cord to verify.
Why does my vacuum cord get warm during use?
It is normal for a high-draw appliance cord to feel mildly warm. However, if the cord is hot to the touch, it indicates internal wire strand breakage (high resistance), an undersized extension cord, or a failing motor drawing excess current.
How do I prevent my vacuum cord from breaking in the future?
Avoid pulling the cord to yank the plug out of the wall socket—always pull by the molded plug head. Avoid pulling the vacuum further than the cord reaches, and wrap the cord loosely using the built-in storage hooks without twisting the cable.
