
There is a distinct, heart-sinking moment every homeowner knows too well: you are halfway through weekend chores, pushing your vacuum across the living room carpet, when the pitch of the motor suddenly changes. It drops to a low, strained whine, or worse, emits a sharp metallic rattle accompanied by the unmistakable scent of burning rubber.
Instantly, your mind races through the options. Do you flip the machine over, grab a screwdriver, and attempt a risky kitchen-table surgery? Or do you pack it up, drive to a repair shop, and brace yourself for a hefty service bill?
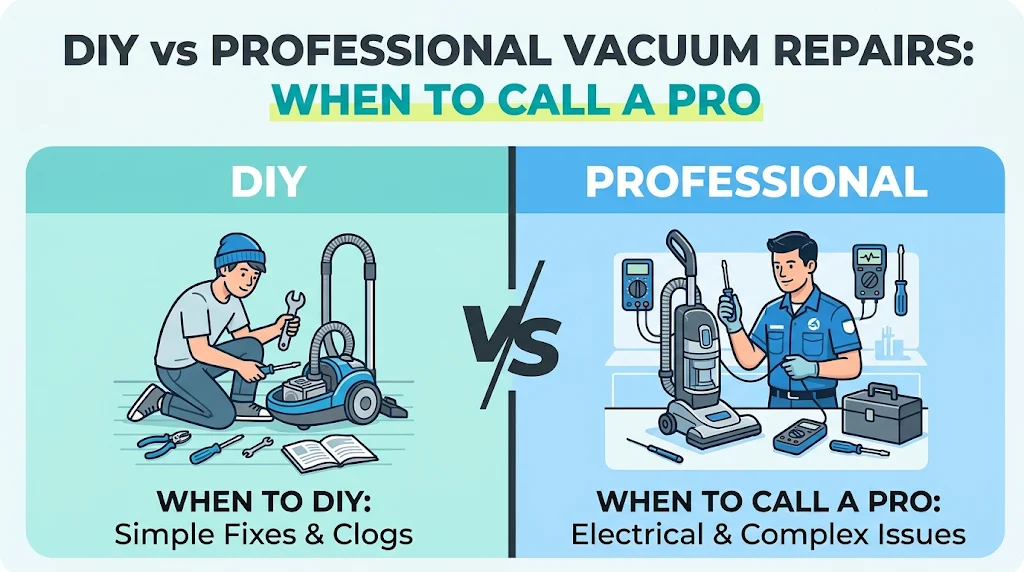
Choosing between a DIY vacuum repair and hiring a professional is more than just a matter of saving money—it is a balancing act between time, mechanical safety, and the long-term lifespan of your investment. Modern vacuums range from simple, belt-driven uprights to computerized, multi-cyclonic canister systems packed with delicate sensors and lithium-ion power packs. Knowing where your technical skills end and a technician’s expertise begins can save you from a ruined appliance, a depleted wallet, or a safety hazard.
In this comprehensive guide, we will break down the anatomy of vacuum failures, explore safe DIY maintenance, outline when you must call a professional, and provide a clear financial framework to help you decide whether to repair or replace.
1. Understanding Your Vacuum: Anatomy and Common Failure Points
Before diving into wrenches and replacement belts, it helps to understand how your vacuum works. Whether you run a heavy-duty upright, a sleek cordless stick vacuum, or a high-end bagged canister, all vacuums rely on the same fundamental principle: creating a pressure differential. A motor-driven impeller fan spins at tens of thousands of RPMs, drawing air and debris through an intake nozzle and expelling it through a filtration system.
Because vacuums deal with friction, high speeds, and constant particulate ingestion, certain components bear the brunt of the wear and tear:
Drive Belts: These elastic or toothed bands transfer rotational energy from the motor shaft to the brush roll. Over time, they stretch, slip, crack, or snap entirely.
Brush Rolls (Agitator Bars): Packed with bristles or rubber paddles, these rotate to beat carpets and flick debris upward. They frequently accumulate hair, threads, and pet fur, which wrap around the end bearings and cause binding.
Airflow Pathways and Hoses: Flexible corrugated hoses, intake ports, and cyclone chambers are prime locations for clogs, particularly when large items or damp debris are accidentally sucked up.
Motors and Carbon Brushes: Universal electric motors power the suction. Over years of use, carbon brushes wear down, armatures foul with dust, and thermal cutoffs trip to prevent overheating.
Filtration and Sealing Gaskets: HEPA filters, foam pre-filters, and rubber gaskets maintain airtight compression. A degraded seal leads to immediate suction loss and dust bypass into the motor housing.
2. The DIY Safe Zone: Simple Fixes You Can Handle at Home
Many common vacuum ailments do not require a professional engineering degree or expensive specialized tools. If you are comfortable with a basic Phillips-head screwdriver and have a pair of scissors on hand, you can easily tackle routine maintenance and minor mechanical repairs.
Clearing Blockages and Clogs
Loss of suction is the #1 complaint among vacuum owners, and 80% of the time, the culprit is a localized blockage.
The Fix: Disconnect the flexible hose from the main body and inspect it by shining a flashlight through one end or dropping a small marble down it. If the marble gets stuck, push the clog out carefully using a blunt broom handle—never a sharp metal rod that could puncture the flexible hose wall. Check the intake neck beneath the vacuum head, as pet hair and lint often compact into a dense plug right behind the brush roll.
Replacing Worn Drive Belts
If your brush roll stops spinning while the motor is still humming loudly, your belt has likely snapped or slipped off its track.
The Fix: Unplug the vacuum, flip it over, and remove the soleplate (the plastic or metal cover guarding the belt). Slip the old belt off the motor shaft and brush roll. Inspect the new belt—most manufacturers stamp replacement numbers directly onto the rubber. Loop the new belt first around the motor shaft, then stretch it over the brush roll, seating it into the designated pulley groove. Rotate the brush roll manually 5 to 6 times to ensure proper alignment and tension.
Pro Tip: Keep a spare drive belt taped inside the bottom cover or stored in your utility drawer. Belts typically cost less than five dollars and fail at the most inconvenient times.
Washing and Maintaining Filters
Bagless cyclonic vacuums and modern stick vacuums rely heavily on washable foam and HEPA filters. When these clog with fine drywall dust or pet dander, airflow chokes, causing the motor to overheat.
The Fix: Tap out loose debris into a trash bin, then rinse foam and cloth filters under cold running water until the water runs completely clear. Crucial Rule: Never reinstall a filter until it is 100% bone dry—usually taking 24 to 48 hours. Putting a damp filter back into a sealed housing creates a breeding ground for mold and can pull moisture directly into the motor windings.
3. The Danger Zone: When DIY Becomes a Safety and Financial Hazard
While routine maintenance empowers the average DIYer, there is a clear boundary where home repairs transition into hazardous territory. Crossing this line risks permanent damage to your appliance, electrical shock, or voiding remaining manufacturer warranties.
Electrical and Motor Failures
If your vacuum emits a sharp ozone smell, sparks from the ventilation ports, or trips your circuit breaker the moment you flip the power switch, step away immediately.
Why Call a Pro: These symptoms point to internal short circuits, frayed power cords within the strain relief housing, or failing motor armature windings. Working with line-voltage electricity (120V–240V) requires professional diagnostic tools like multimeters and insulation testers. Attempting to rewire internal switches or solder motor leads without proper electrical knowledge creates severe fire and electrocution hazards.
Sealed Motor Housings and Modern Cordless Units
High-end cordless stick vacuums (such as modern Dyson, Shark, or Tineco models) feature compact, tightly integrated modular engineering. Their electronics, batteries, and micro-motors are often housed in glued or ultrasonically welded plastic shells.
Why Call a Pro: Forcing open a sealed cordless vacuum housing almost always shatters the fragile plastic clips and housing walls beyond repair. Furthermore, modern lithium-ion battery packs pack immense energy density; puncturing or miswiring them during a DIY cell replacement can trigger thermal runaway, smoking, or battery fires.
Complex Electronic Control Boards and Sensors
Many premium uprights and robotic vacuums feature digital displays, auto-adjusting floor sensors, and electronic clutch systems.
Why Call a Pro: When error codes flash on an LED interface or the electronic brush-roll clutch refuses to engage despite a clean belt, the issue usually lies in the printed circuit board (PCB) or internal wiring harnesses. Without factory service manuals, diagnostic bypass codes, and specialized micro-soldering gear, DIY troubleshooting becomes an expensive guessing game of buying and swapping random parts.
4. Cost-Benefit Analysis: Repairing vs. Replacing Your Vacuum
When a major component fails—such as the main motor assembly or a primary electronic control board—you face the ultimate consumer dilemma: should you pay for a professional repair, or cut your losses and buy a brand-new unit?
To make an objective, cost-effective decision, apply the 50% Rule and Age Threshold Matrix:
| Vacuum Tier / Type | Average Lifespan | Typical Professional Repair Cost | Replacement Threshold Recommendation |
| Budget Upright / Stick ($50 – $150) | 2 – 4 years | $40 – $90 | Replace: Repair costs nearly equal a new unit. |
| Mid-Range Upright / Canister ($200 – $500) | 5 – 8 years | $80 – $180 | Repair: Worth servicing if under 5 years old. |
| Premium / Buy-It-For-Life ($600 – $1,200+) | 10 – 20+ years (e.g., Miele, Sebo) | $120 – $250 | Repair: Always service; built to be overhauled. |
Key Questions to Ask Before Paying for Service:
What is the age of the machine? If your mid-tier vacuum is already 7 years old and has lived past its expected operational lifespan, sinking $120 into a new motor is a gamble. Another component (like bearings or switches) is likely to fail soon after.
Is it covered under warranty? Check your purchase date. Many premium brands offer 5- to 10-year motor or body warranties. Taking a screwdriver to a warrantied machine to DIY a fix will instantly void your coverage.
Are OEM parts readily available? Older or obscure budget brands often discontinue replacement parts within three years. If a technician has to source rare or discontinued components, shipping delays and markup fees will quickly push the repair total past the price of a brand-new, modern vacuum.
5. Common Pitfalls and Mistakes to Avoid During Vacuum Repair
If you decide to take on a DIY repair or drop your machine off at a local repair shop, steer clear of these frequent errors that sabotage repairs:
Mistake 1: Ignoring Unplug Safety.
The Fix: Always unplug the vacuum from the wall outlet and remove removable battery packs before touching any moving parts. Accidental engagement of the power switch while your fingers are near the agitator bar can cause severe pinch injuries or lacerations.
Mistake 2: Forcing Plastic Interlocks.
The Fix: Modern vacuum bodies rely heavily on snap-fit plastic tabs rather than screws. If a shroud or cover refuses to lift off, do not pry it aggressively with a heavy flathead screwdriver. Search online for a disassembly teardown video to locate hidden release latches or screws concealed beneath brand stickers.
Mistake 3: Using Generic “Close Enough” Replacement Parts.
The Fix: Belts, filters, and hoses must match your exact model number. A belt that is two millimeters too loose will slip and melt from friction; a belt that is too tight will overload the motor bearings and burn out the armature.
Mistake 4: Over-Lubricating Bearings.
The Fix: Applying heavy machine oil or grease to brush-roll end caps seems like a smart way to stop squeaking, but oil acts as a magnet for fine carpet dust and hair. Within weeks, the oil turns into a thick, abrasive paste that completely locks up the bearings. Use dry lubricants or clean and wipe bearings dry.
Frequently Asked Questions
How do I know if my vacuum motor is actually burned out?
A burned-out motor typically produces a very distinct, acrid smell of melting copper varnish and electrical insulation, accompanied by visible smoke or complete failure to turn on. If the unit hums loudly when plugged in but the fan does not spin, the motor shaft may be seized due to failed bearings or wrapped debris jamming the impeller.
Is it worth taking an old vacuum to a local repair shop?
Yes, if it is a high-end European canister or premium upright (such as Miele, SEBO, or older Kirby and Rainbow models). These machines are modular, engineered to be rebuilt, and built with commercial-grade components. However, for a $70 department-store stick vacuum, local diagnostic and labor fees will almost always exceed the replacement cost.
Can washing a vacuum filter ruin the machine?
Washing a filter will not ruin the machine if you allow it to dry completely. The danger arises when users reinstall damp or wet foam/HEPA filters. Moisture is pulled directly through the high-speed fan motor, causing electrical short circuits, rust on internal steel bearings, and mold growth inside the sealed air chambers.
Why does my vacuum keep shutting off after 10 minutes of use?
This is almost always a symptom of thermal overload protection kicking in. When airflow is heavily restricted—either by a choked HEPA filter, a stuffed bag, or a severe hose clog—the motor cannot draw cool air across its windings. The internal thermal cutoff switch trips automatically to prevent the motor from melting down, shutting the machine off until it cools down.
Conclusion
Maintaining a clean home starts with a reliable vacuum, but keeping that vacuum running efficiently requires knowing your limits. Routine upkeep—such as cutting away wound hair, swapping out stretched drive belts, and washing clogged filters—keeps your machine running at peak performance without spending a dime on labor.
However, when faced with electrical shorts, smoking motors, sealed lithium-ion battery assemblies, or complex circuit faults, recognize when it is time to put down the screwdriver and consult a professional technician. By weighing repair costs against appliance age and safety hazards, you can make smart, sustainable choices that protect both your home and your budget.
