
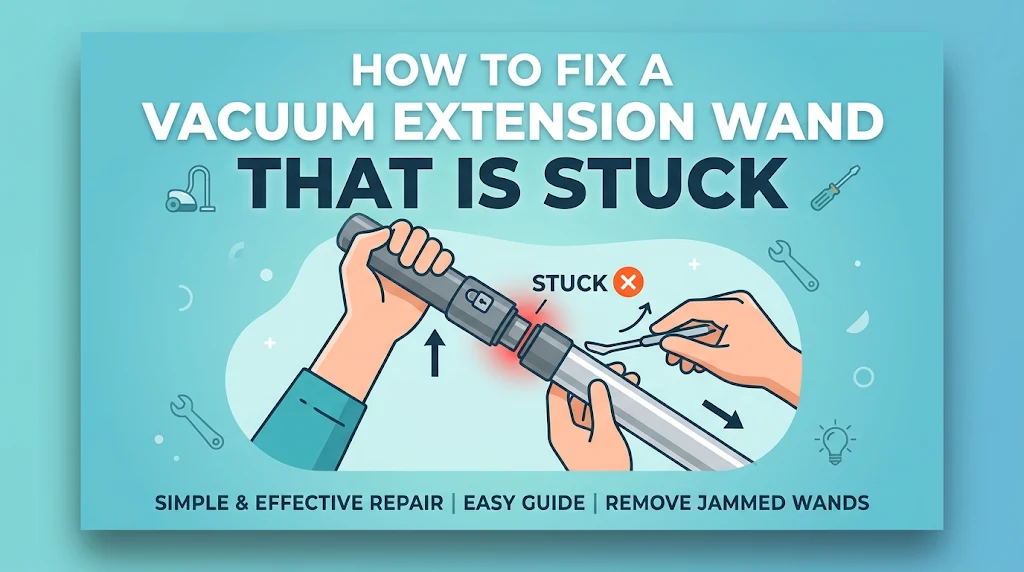
There is few household frustration quite like being halfway through your weekly deep clean, only to find that your vacuum cleaner’s extension wand has mysteriously fused together. Whether you are using a sleek upright with a telescopic wand, a canister vacuum with interlocking metal pipes, or a cordless stick vacuum like a Dyson or Shark, a stuck wand halts your cleaning momentum instantly.
You pull. You twist. You pull harder until your arms ache—and the tubes refuse to budge.
Before you resort to throwing away a perfectly good attachment set or hauling your vacuum to a repair shop, take a breath. Vacuum extension wands get stuck for very predictable mechanical and environmental reasons, and with the right techniques, household lubricants, and leverage strategies, you can separate them in minutes without damaging your machine.
In this comprehensive guide, we will break down the exact root causes of stuck vacuum wands, walk you through step-by-step rescue protocols, highlight common mistakes to avoid, and share preventive tips to ensure it never happens again.
1. Understanding Why Vacuum Wands Get Stuck (The Root Causes)
To fix a stuck vacuum extension wand effectively, you need to understand why it happened. Vacuum wands rely on tight tolerances to maintain airtight suction. When microscopic debris, moisture, or mechanical stress enters these tight spaces, they lock together tightly.
Suction Lock and Air Pressure Dynamics
Many people assume stuck wands are purely a mechanical jam, but physics plays a massive role. If air seals tightly around the joint and the internal pressure drops, a vacuum lock can form. This creates a miniature suction cup effect holding the two tubes together against atmospheric pressure.
Debris, Dust, and Hair Accumulation
Vacuum cleaners pull in everything on your floors: fine pet dander, microscopic dust particles, carpet fibers, and long hairs. Over time, these particles slip past the inner seals or locking collars of extension wands. When combined with minor moisture from cleaning or humidity, this debris acts like cement, binding the outer and inner metal or plastic sleeves together.
Metal Galling, Corrosion, and Expansion
For metal wands made of aluminum or stainless steel, friction and metal-on-metal contact can cause a phenomenon called galling. When two metal surfaces rub under pressure without adequate lubrication, microscopic bits of metal tear off and weld themselves together. Furthermore, temperature fluctuations can cause metal to expand unevenly, trapping an inner tube inside an outer sleeve.
Pro Tip: If your vacuum was stored in a damp basement or garage, check for white powdery corrosion or rust around the joints. Rust expands as it forms, welding telescoping tubes in place from the inside out.
2. Step-by-Step Fixes for Friction-Fit and Locking-Tab Wands
Different vacuum designs require different extraction strategies. Identify whether your wand uses a friction-fit (slide-together), a telescopic slider (with a collar or locking pin), or a click-lock button mechanism, and follow the corresponding protocol.
Method 1: The Warm Water and Dish Soap Technique (For Telescopic Collars)
If you have a telescopic wand with a plastic tightening collar or locking ring that refuses to slide, soap and warm water can break the friction seal and wash away stubborn grit.
Prep the Area: Lay down a towel on your work surface or take the wand into a utility sink or bathtub.
Apply Warm Water: Pour warm (not boiling) water slowly over the stuck joint. The heat helps expand the outer plastic or metal sleeve slightly.
Add Lubricant/Soap: Apply a few drops of liquid dish soap or liquid dish detergent directly into the seam where the inner and outer tubes meet. Allow it to sit for 3 to 5 minutes so it can capillary-action its way into the joint.
Twist and Pull: Hold the inner tube firmly with one hand and the outer tube with the other. Instead of pulling straight apart immediately, try to twist them in opposite directions first to break the friction bond, then pull outward with steady, even pressure.
Method 2: Leverage and Twist (For Friction-Fit Metal Pipes)
If you are dealing with two straight metal tubes jammed together via a friction fit, brute force will only distort the metal and make the jam permanent. You need controlled leverage.
Secure a Grip: Wear rubber-gripped work gloves or wrap thick rubber bands (or a rubber jar-opener pad) around both sections of the wand. This gives you high-friction gripping power without scratching the metal.
Apply Rotational Torque: Do not pull straight apart. Twist the tubes clockwise and counterclockwise relative to one another in short, sharp jerks.
Use a Wooden Block Leverage Trick: If your hands slip, place the joint across the opening of a sturdy workbench or table slot so the joint hangs over the edge. Tap lightly around the outer circumference with a rubber mallet or a block of wood to shock the debris loose, then twist and pull.
Method 3: Releasing Jammed Click-Lock and Push-Button Mechanisms
Cordless vacuums and modern canister units often use spring-loaded metal buttons that click into square holes to secure attachments and extension wands. If these buttons become stuck flush with the housing, the release pin cannot retract.
+-------------------------------------------------------------+
|                QUICK TROUBLESHOOTING CHECKLIST              |
|  [ ] Identify mechanism type (Button-lock vs. Friction)     |
|  [ ] Clear visible hair & dust from the release collar      |
|  [ ] Apply penetrating fluid or dish soap if jammed         |
|  [ ] Twist gently to break seal—never bend or hammer raw    |
+-------------------------------------------------------------+
Clear the Button Cavity: Use a toothpick, needle, or compressed air can to blast out packed lint and dust bunnies surrounding the release button. Often, compacted dirt prevents the button from depressing fully.
Depress with a Tool: If the button is too stiff for your thumb, use the flat head of a screwdriver or the back of a spoon to press the button inward completely.
Wiggle and Pull: While holding the button fully depressed, gently wiggle the inner wand side-to-side (lateral movement) to coax the internal locking pin out of its hole.
3. Advanced Troubleshooting for Stubborn, Seized Wands
If standard soap and twisting fail, your wand is severely seized. It is time to deploy advanced mechanical remediation techniques used by appliance repair technicians.
The Thermal Expansion Cycle (Hot and Cold)
Metals expand when heated and contract when cooled. You can exploit this property to break stubborn bonds between nested metal tubes.
Isolate the Inner Tube: If the inner tube is metal, pack ice cubes inside it or wrap a cold, ice-filled washcloth tightly around just the inner tube for 5 minutes. This causes the inner tube to contract slightly.
Warm the Outer Sleeve: Simultaneously, pour warm water over the outer sleeve or apply a hairdryer on a medium setting around the outer joint.
Pull Immediately: Once the temperature differential is established (inner tube cold/shrunken, outer tube warm/expanded), twist and pull immediately before the temperatures equalize.
Using Penetrating Fluid (WD-40 or Silicone Spray)
When chemical bonds, rust, or sticky residues are at fault, water alone won’t cut it.
Apply a targeted spray of penetrating oil (such as WD-40 or a silicone-based lubricant) directly into the seam of the stuck joint.
Let the vacuum wand stand vertically for 15 to 30 minutes so gravity can draw the fluid deep into the mating surfaces.
Wipe away excess fluid, grip securely with rubber gloves, and twist to separate.
Example: Imagine a homeowner trying to separate rusted bicycle handlebars from a stem—vacuum wands operate on the exact same cylindrical friction principles. Penetrating oil breaks the surface tension and dissolves microscopic grit locking the two cylinders together.
4. Common Pitfalls and Mistakes to Avoid
When frustration peaks, it is easy to make mistakes that permanently ruin your vacuum equipment. Avoid these frequent errors:
Using Raw Pliers or Vise Grips Directly on Metal: Squeezing thin aluminum or plastic vacuum tubing with metal pliers will instantly dent or crush the tube, rendering it completely airtight-useless. Always use a protective barrier like a thick towel or rubber pad if using tools.
Applying Heavy Greases or Oils Permanently: While WD-40 is great for temporary unsticking, never lubricate your vacuum tubes with heavy automotive grease or cooking oil. These substances attract dust, pet hair, and carpet fibers instantly, guaranteeing that your wand will jam up even worse next time.
Bending or Yanking at an Angle: Pulling at a sharp 45-degree angle places immense shearing stress on the joint, which can snap plastic locking collars or bend metal tubing beyond repair. Always pull straight along the longitudinal axis of the tubes.
5. Preventive Maintenance: How to Keep Your Vacuum Wand Sliding Smoothly
Once you successfully unstick your vacuum extension wand, a few minutes of preventative care will ensure you never face this headache again.
Clean After Messy Jobs: If you use your vacuum to suck up fine drywall dust, fireplace ash, or damp pet hair, take the extension wands apart immediately afterward and wipe out the interior sleeve with a damp microfiber cloth.
Use Dry Silicone Spray: Instead of oily lubricants, spray a light coat of dry PTFE or silicone spray onto the sliding portion of the wand and wipe it down with a clean rag. It leaves a slick, microscopic barrier that repels dust and prevents friction locking without attracting debris.
Store in Dry Environments: Avoid leaving vacuum attachments in humid basements or uninsulated sheds where condensation can form inside metal joints, promoting rust and galling.
6. Frequently Asked Questions (FAQs)
Can I use WD-40 to unstick my vacuum wand?
Yes, WD-40 is excellent for breaking down stubborn grit and rust in metal-on-metal or stuck telescopic wands. However, make sure to thoroughly clean and wipe away any residual oil with soap and water after separating the tubes so it doesn’t attract future dust and dirt.
What do I do if the release button is jammed or broken?
If the spring-loaded release button is completely broken or pushed past its retaining track, you may need to insert a thin wire or pick tool into the release hole to manually lift the locking tab while pulling the tubes apart. If the button assembly is permanently shattered, replacing the wand section is usually more cost-effective than attempting structural repairs.
How do I know if my vacuum wand is permanently damaged?
If the metal tubing is visibly creased, warped, or cracked from excessive force, or if the internal locking channel is stripped out, the wand will no longer maintain proper airtight suction. In this case, structural integrity is compromised, and replacement is necessary for optimal vacuum performance.
Why does my telescopic wand keep slipping down while vacuuming?
If your wand collapses on its own while you are vacuuming, the internal locking collar or clutch mechanism has worn out or lost tension. Tighten the adjustment ring clockwise, or inspect the internal plastic friction collet for cracks that prevent it from gripping the inner tube securely.
7. Conclusion
A stuck vacuum extension wand is an annoying hurdle, but it is rarely a permanent catastrophe. By diagnosing whether your tool is suffering from suction lock, debris buildup, or thermal expansion, you can apply targeted solutions—ranging from warm soapy water and leverage to penetrating lubricants and thermal shock.
Take your time, protect your tubes from brute-force damage, and incorporate a quick wipe-down into your routine maintenance checklist. With your vacuum wand sliding smoothly once more, you can get back to keeping your home spotless with ease.
Ready to streamline your household cleaning routine? Check out our other expert guides on troubleshooting loss of suction and deep-cleaning motorized brush rolls to keep your vacuum running like new!
